Sunday, September 23, 2012

Virtue Spire


Written by: Maximilian Jany
Photographs by: Maximilian Jany


Since the release of the Rotor in 2009, there hasn't really been a loader that has made me sit up and go "wow". Even the Prophecy failed to really impress me due to the fact that it wasn't that different from any of the other Empires loaders that I had used in the past and all they really did was improve on the horrid Magna loader. But then after weeks of teasing with partial images, news broke that Virtue would be releasing a loader and it got me rather excited. I had high hopes for this loader even before the specs were released, as Virtue makes upgrades, boards and speed feeds for loaders, so I guess it was only a matter of time before they would create their own.

So like the good paintball enthusiast that I am, I placed an order for one just shortly after they were released and waited patiently for it to arrive. And arrive it did and just to sweeten the deal I got the Virtue Crown to go with it. Usually when a new loader is released, there is a bit of a wait before a speed feed is available. But Virtue already makes the Crown and Crown2 for almost every loader on the market, so it was a no brainer for them to release one with the debut of their very first loader.


The hard facts
Length: 228.6mm
Height: 101.6mm
Width: 101.6mm 
Weight: 468g
Batteries: 3AA
Capacity: 200+

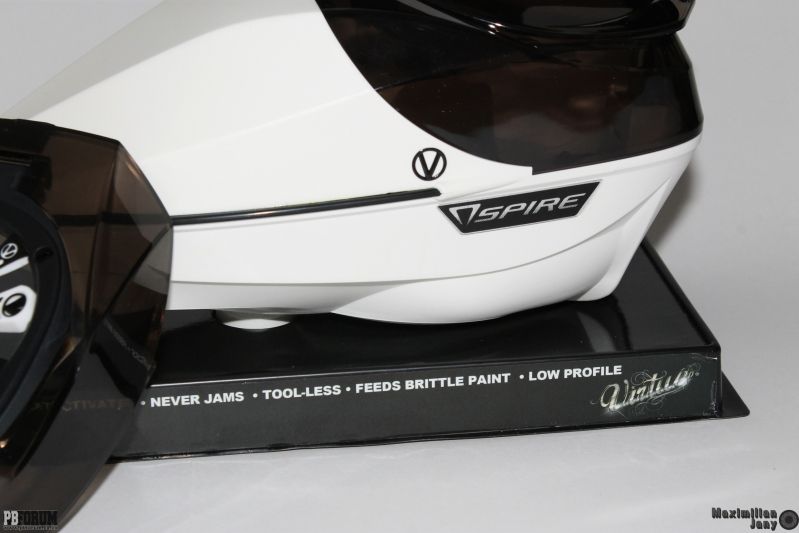
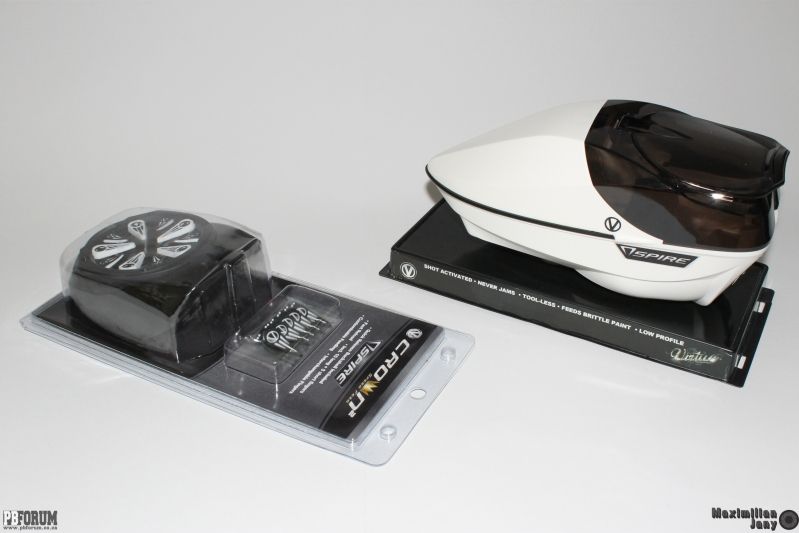
The packaging for the Spire is very unique and I can honestly say that in all my years of playing and the countless loaders that I have bought, I have never seen a loader packaged like this. It comes in a see through plastic container, that very nicely shows off the loader and is perfect for displaying in shops and at fields. In the box is the Spire loader itself, a full colour instruction manual and a high quality Virtue sticker, nothing really more to expect.


The way the Spire works is quite different from all the other loaders on the market today, it uses a G-force sensor to detect the acceleration of each and every shot. The Spire also offers a self monitoring motor that sends feedback to the board on the amount of torque being asserted on the motor and allows the loader to adjust so that you get the best performance possible with the paint that you are using. Like stated in the hard facts about the loader, it runs off 3 AA batteries, same as the Rotor and is said to have great battery life. But seeing as I haven't had the loader for long enough, I can't really comment at this point if Virtues claim is true or not. Turning on the Spire is as just as easy turning on the Rotor and is a simple instant on push button, no having to hold the power button till the LED flashes or the motor starts up.


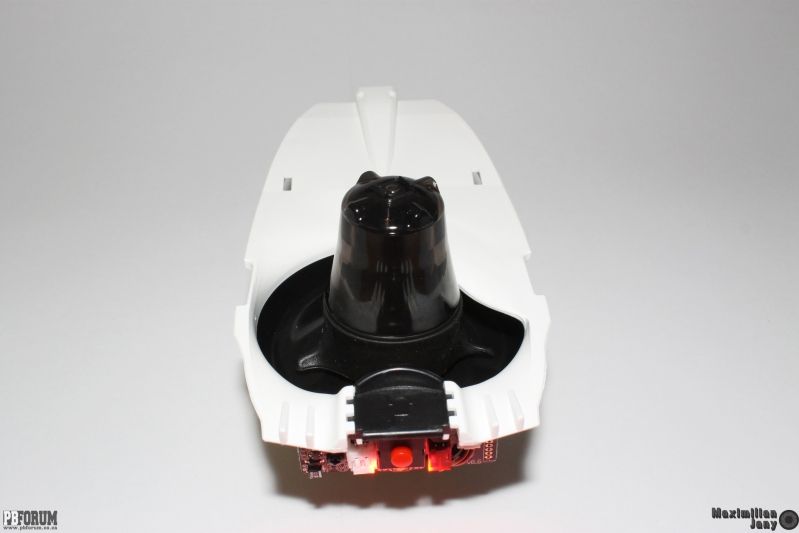
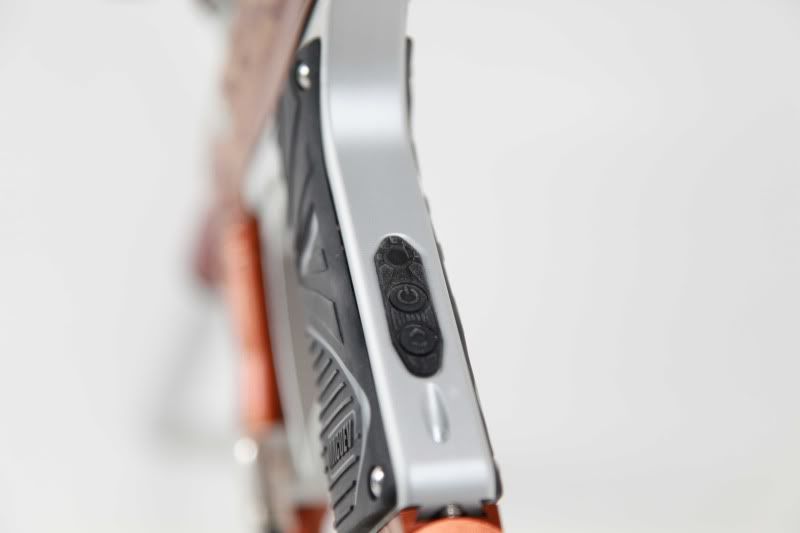
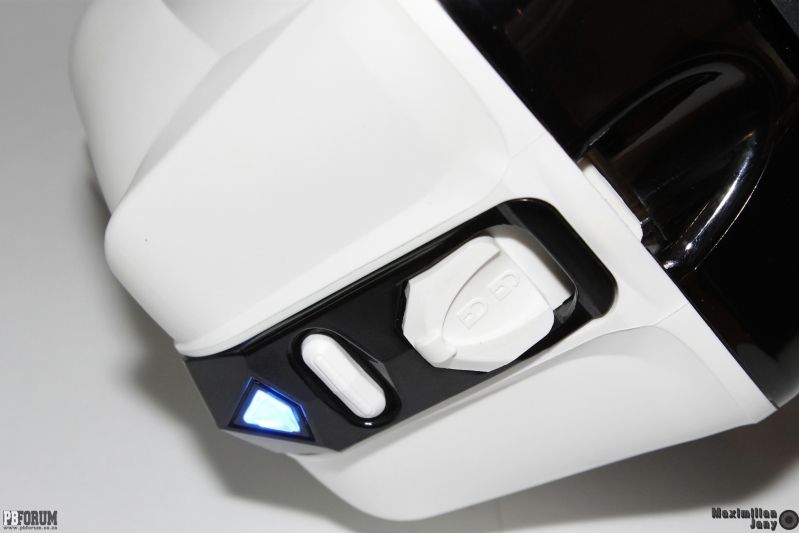
Now this is where the guys at Virtue went the extra mile, they didn't just settle with a bright coloured LED to indicate that the hopper is on, but they also added a speaker to add an audible beep when you turn the loader on. This is a nice touch as they added the option to turn off the LED indicator if you want to play night games or if the LED annoys you, so you will still be able to tell if the Spire is on or off.  But if you are going to keep the LED turned on then it will indicate more than just if the loader is on or not. The solid blue light will indicate that the Spire is on and ready to be used, the solid red light will indicate that the Spire is on, but there are no paintballs in the drive tray, a yellow light on start up will indicate that the batteries are low and then finally a blinking blue light will indicate that the loader has gone into standby mode (will touch on this topic in a bit). Finally all the electronics are coated to make sure that they are water resistant and will withstand moisture and paint getting all of the components. All the cables are neatly tucked away to make sure that they won't get snagged when removing the tray from the hopper.


Virtue first came onto the market selling aftermarket boards for markers and already released a chip and various boards for other loaders, so you would expect nothing less than a fully equipped board in the Spire and it doesn't disappoint at all in that regard. It allows the user to access the programmable parameters just as easily as any of the marker boards that they offer. Once you get into the programmable mode, the Spire offers five different parameters that you can adjust and then also the option to reset the loader to the factory defaults. Those five parameters are; turning on and off of the speaker, turning on and off of the LED, turning on and off of the standby mode, setting of the G-force sensors sensitivity and then finally setting of the drive pressure. Virtue however recommends that you don't adjust the G-force sensitivity or the drive pressure unless your Spire isn't running how it's designed to, guessing it has to do with the loaders self adjusting motor and board.  The Spire comes with the standby mode turned off and once turned on it will put the Spire into a sleep mode to prolong battery life, to get it out of the standby mode, simple press the force feed button or fire your marker, which I think is a cool little feature.

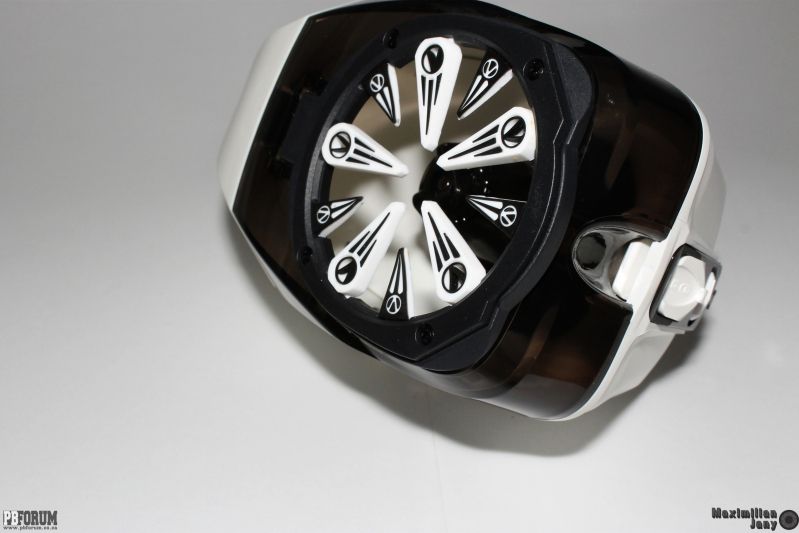
The Spire has soft rubber paddles on the drive cone that are meant to be softer on brittle paint and I have yet to fully test if it really works. So far we tested DYE's CG paint, all of the Sterling paints and also a bag of Meteor, non broke or jammed in the Spire. But the conditions were pretty much perfect as we have the luxury of an indoor field and we will see what winter will offer 
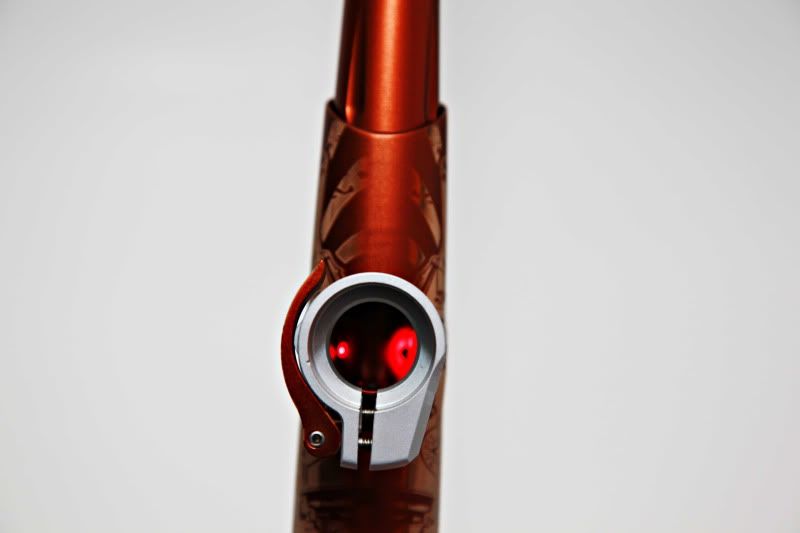
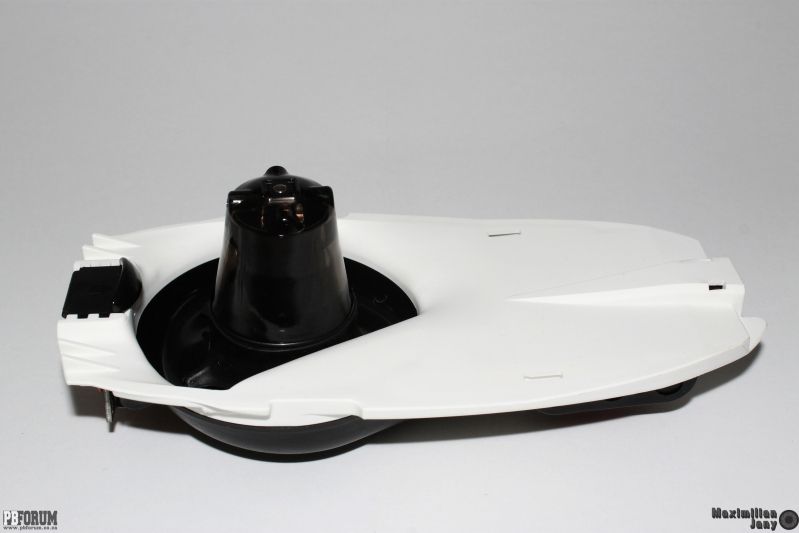
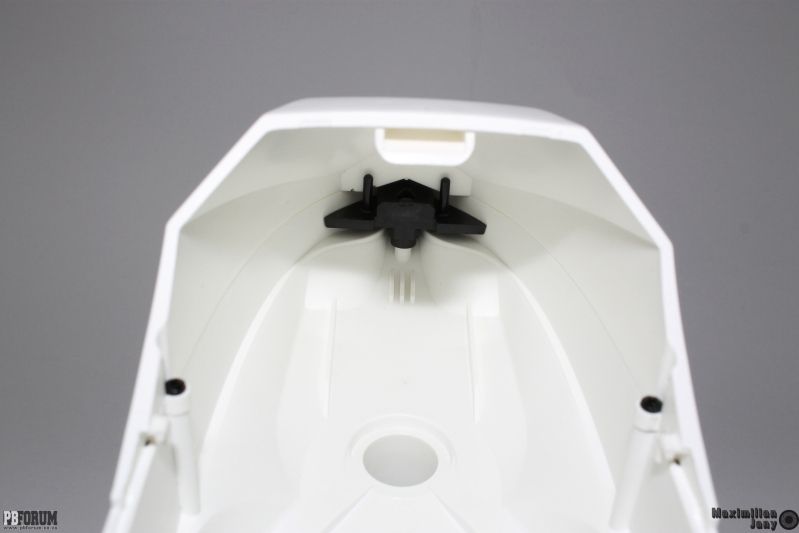
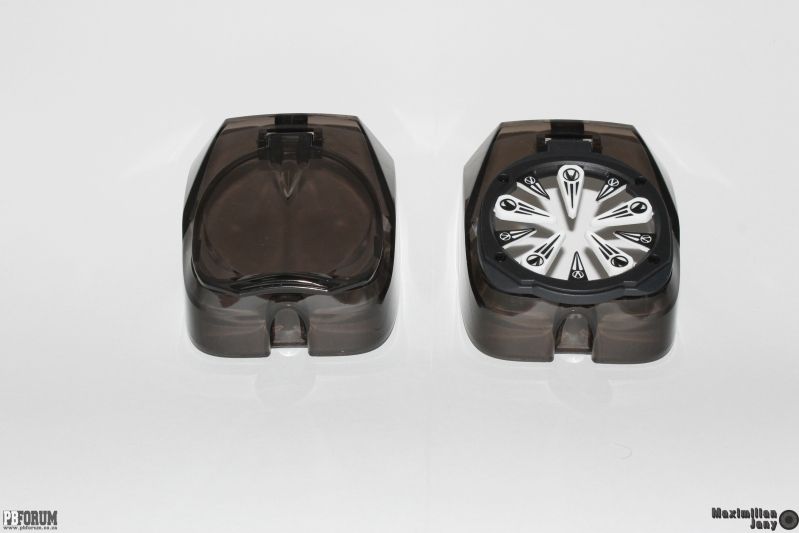
us in the coming months. The Spire also utilises a great anti-jam system, the drive cone is spring loaded and will force the paint upwards and can un-jam almost any jam automatically. But they went one step further and if it does land up jamming then the guys at Virtue added a force feed button on the back of the loader to un-jam those tricky jams. This forces the Spire to spin and allows the spring loaded drive cone to work its magic. The drive was designed like a cone in order to funnel paint more effectively into the tray and also reduce the pressure of paint stacking up and there for reducing the chance of crushing brittle paint.


Now for the part that is the biggest factor for me when I look at a new loader, the shell. I have broken quite a few shells in the past and it's quite annoying having to replace shells all the time. This is one of the reasons why I love the Rotor so much, it has a super tough shell that can stand up to every punishment that you can throw at it. The Spire is no different, as the shell is made up of tough impact resistant materials and the neck has no 
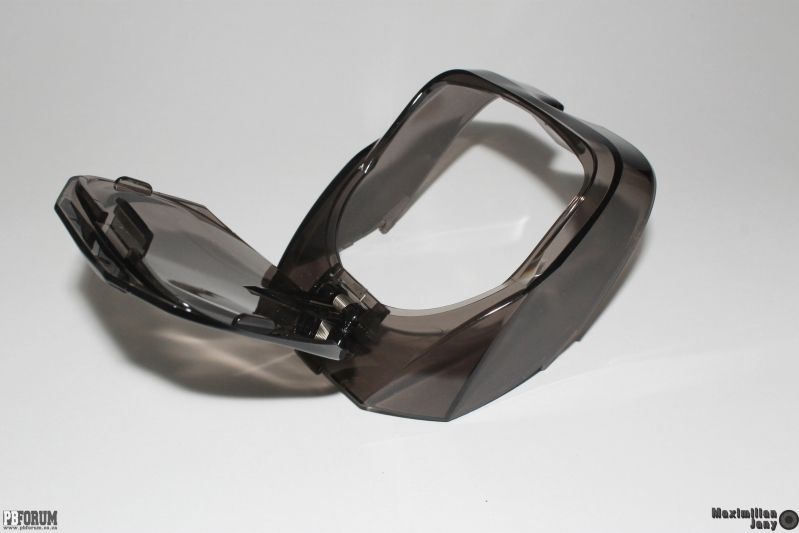
chance of cracking or snapping off like other loaders. My only worry with the shell is the back section, which is a tinted transparent material and I doubt that it will stand up to nearly as much torture as the rest of the shell. But 
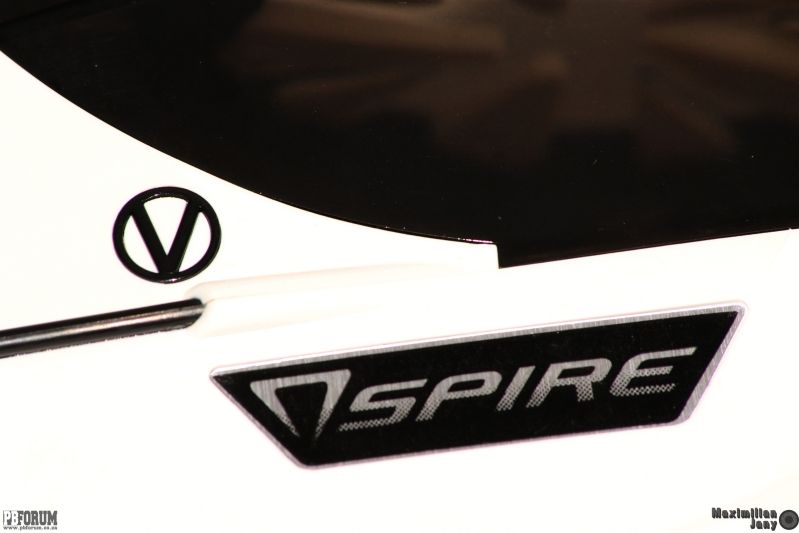
only time will tell if it is as resilient as the rest of the Spire.  But the idea behind the transparent back section of the shell is so that you can look inside and see how much paint you have left, not that I ever did that with my Rotors, but then again they did have those tiny windows on the back that were pretty useless. Virtue say: "View paint levels in a single glance without showing everyone else" last time I checked I never look to see if an opposing player is out of paint, as the games are usually very quick and quite frankly it's too much effort to strain my eyes to check if his hopper is full or empty.


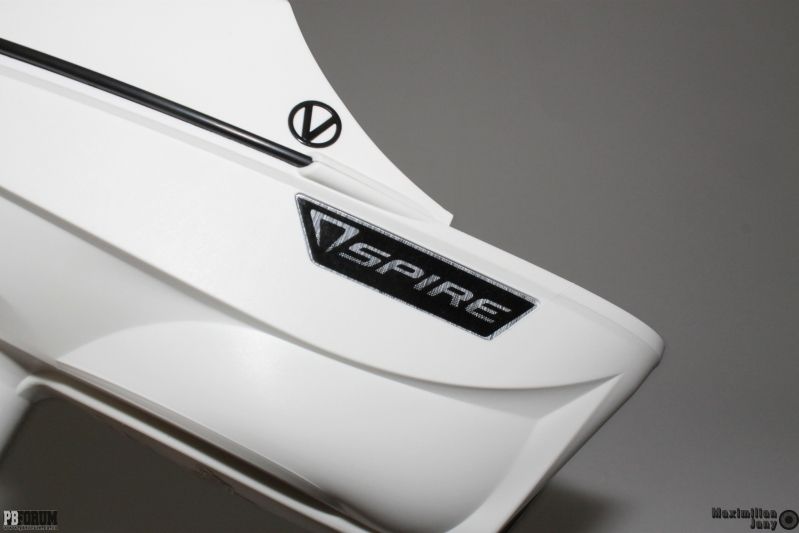
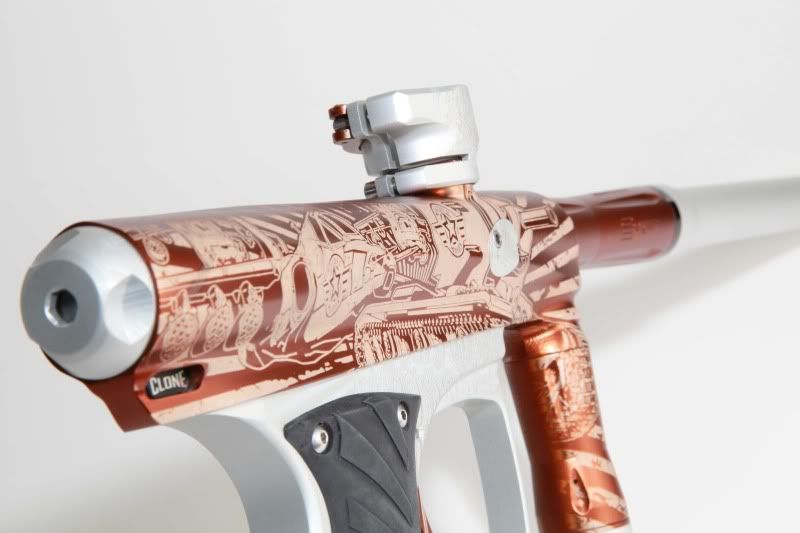
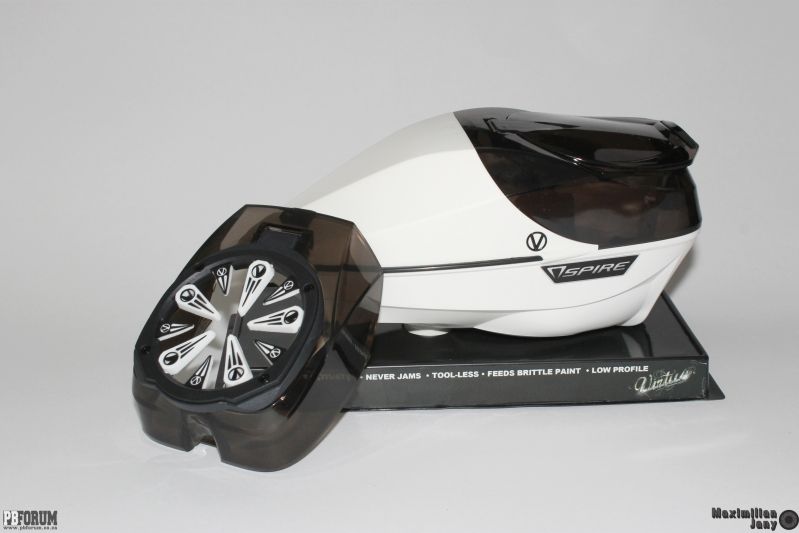
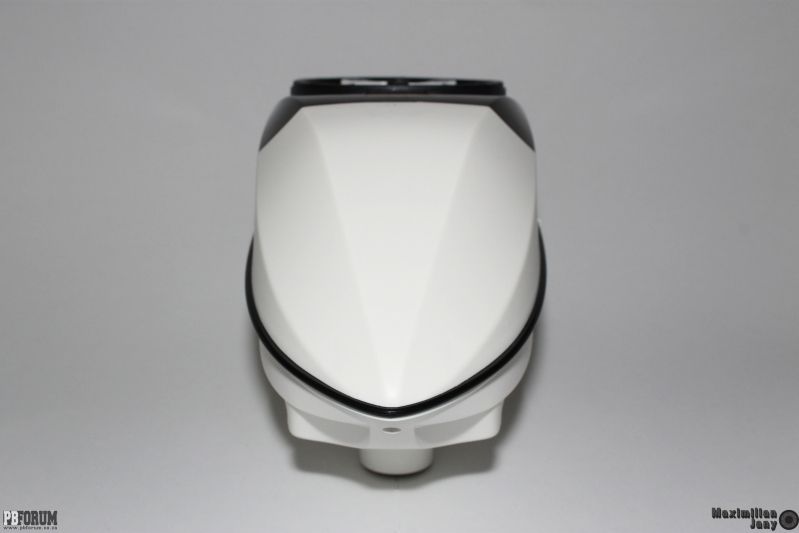
In the looks department, there have been quite a few comments floating around the internet about how they think the Spire is a bit ugly or has too many angles. I personally like the look of the Spire and jokingly commented at the last practice that it looked like the underwater car from one of the James Bond movies. It is slightly angled, but not as drastically as the first images made it out to be. Plus I doubt that it has any sinister plot behind the angles to be a ball bouncing machine, but I could be wrong. But these angles give the Spire a very small profile and it sits rather well on your marker and is fairly well balanced when filled with paint. But I did notice that the outside diameter of the neck is slightly smaller than that of other hoppers and I needed to adjust the feed neck on the Proto Reflex all the way so that the hopper could be secured properly. Colour wise, it comes in two colour choices, Black and white and not too sure if Virtue plans on releasing more colours in the future, but it's not really a big issue if they don't.


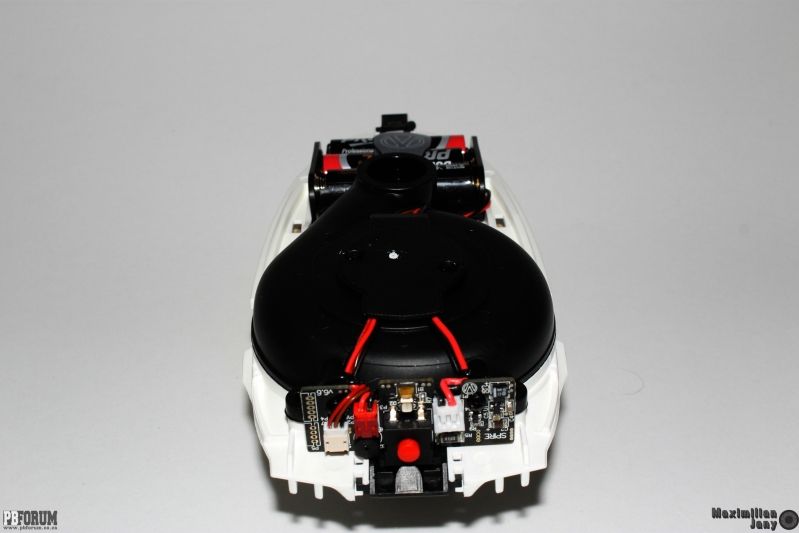
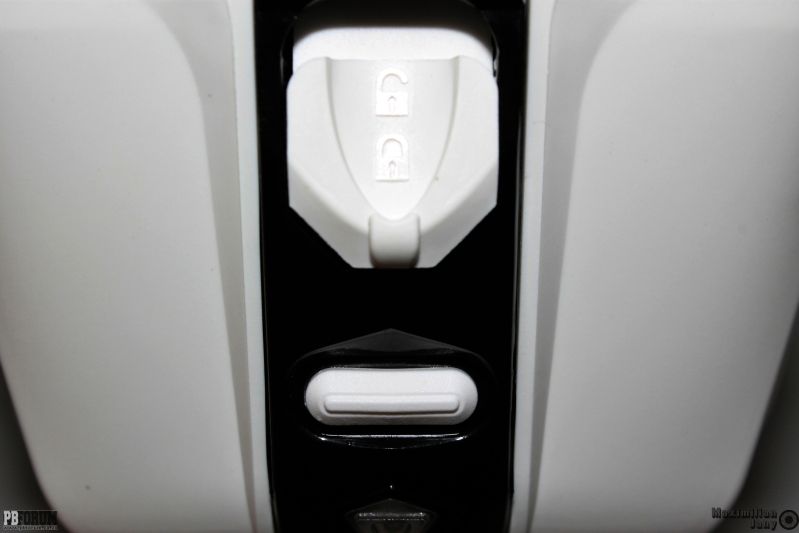
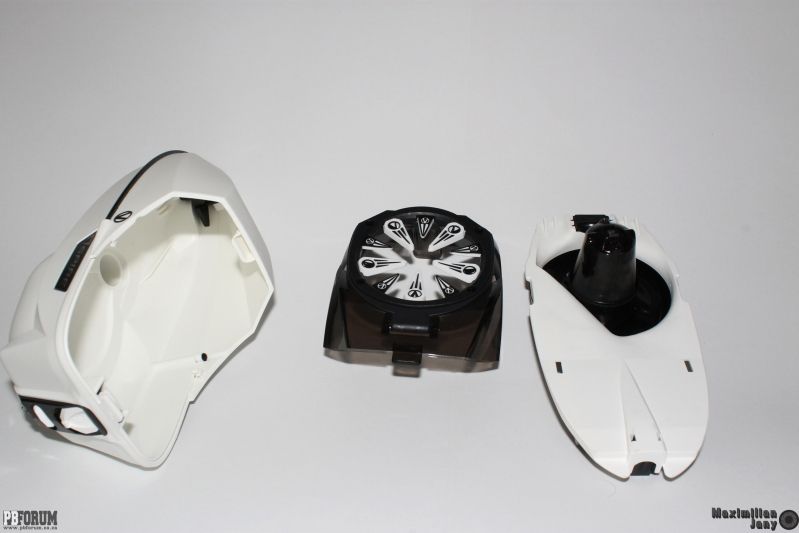
Taking the Spire apart is extremely easy and even a child could do it. There is a tab on the back that you push up to unlock and then inwards to remove the back section. Now you can access the internals in case you do manage to break any paint. Then with a second tab located inside the loader, you can pull out the entire tray. All the internals of the Spire are located on a single tray, which makes it easy to remove and get to if something is wrong 
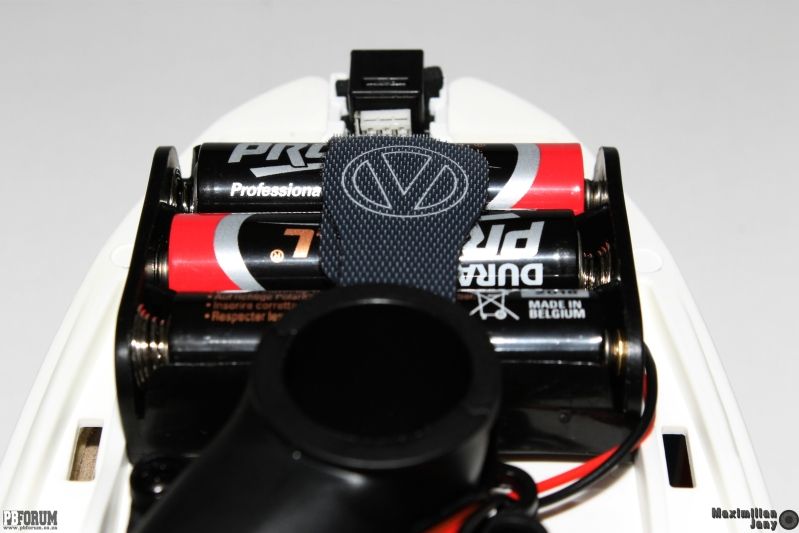
with it or if you need to replace the batteries. To change the batteries, you simply pull out the tray and flip it over and you will find the battery harness at the front of the tray and all you have to do is remove the Velcro straps and you can install the three AA batteries, it's just that simple. To take the drive cone out you will need a Philips screwdriver, so it is not completely tool-less, but you won't need to get to the drive very often or even at all, so this isn't an issue at all.


The lid that comes with the Spire has a fairly large mouth, so you shouldn't have any issues with any of the pods on the market today. The lid is spring loaded and uses friction to stay closed, so no magnets. but I have never worn-out a lid on any of my hoppers in the past, so I don't see this as being 
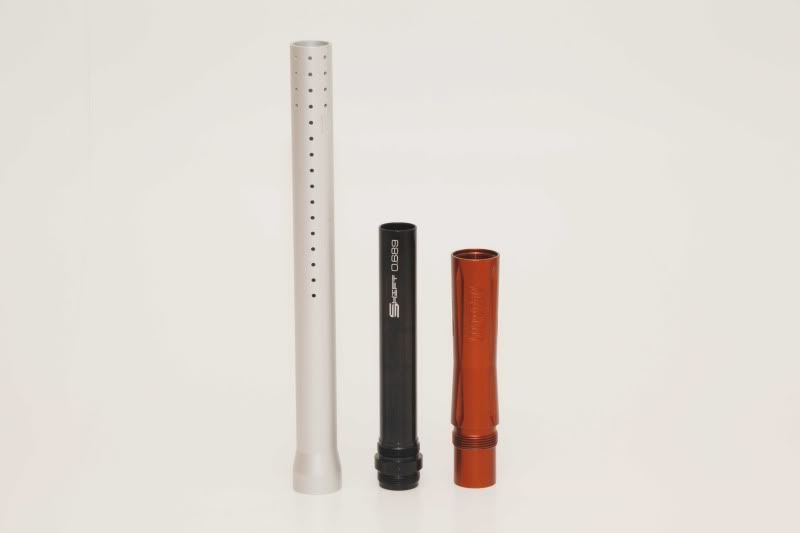
much of a con. But there is the option of the Crown2 and it is a complete replacement of the back shell section. The beauty of this is that you can change between the speed feed and the lid in a matter of seconds if the weather turns bad or if you are going to play in dirty and dusty conditions. But the Crown2 is an extra for the Spire and will set you back a few extra bucks, but then again so will every commercial speed feed for any loader on the market. But never the less the Crown2 is a great speed feed and comes with short and long fingers, so that you can configure the Crown to your own specifications. Use the longer fingers if you are worried about losing paint out of your loader while you are playing, but you will have to put in some extra effort to get the paint in first. Or if you don't really care about losing some paint then use the shorter fingers as they greatly reduce the time needed to fill your Spire. The Crwon2 also has a spring loaded lid that can be opened for easier filling, but out of the box it will be secured in place by four screws. You can remove the screws and then it will pop open like the standard lid, but I personally don't mind keeping it screwed down as it reduces the chances of the loader opening on you and losing a bunch of your paint.


We tested the Spire on three different markers and with a few different grades and brands of paintballs. We used a Planet Eclipse Geo2, a Planet Eclipse Ego11 and a Proto Reflex. The Geo and Ego were both set to uncapped semi-auto and the Reflex was set to PSP ramp with a 20bps cap. The loader performed flawlessly on all three markers and we put roughly 3000 rounds through it, not a single jam or broken ball. But like stated earlier, we tested the Spire in near perfect conditions as our field is an indoor field, so further testing and abuse will be needed to see if I can find a fault in this loader.

So far my only worry with this loader is battery life as I haven't been able to fully test it and then of course the material that the back section of the shell is made out of. But with both of those issue a little more testing will shed some light on my concerns.  Then there is the issue of price, some people have been mouthing off online about the price being too high. But it's slap bang in the middle between the Z2 and the Rotor (unless you live in South Africa, where it is greatly over priced) and those same people complain about the price of the Rotor and the Prophecy, so I can hardly take them seriously. My personal opinion so far is that this is an awesome loader and feel that it is a far better design than both the Rotor and Prophecy and hopefully it won't be proven wrong. 


Thursday, August 4, 2011

Macdev Clone VX

Written by Maximilian Jany
Photographs by Gastone Roulstone

The Clone is a real mans marker, a marker made in the land down under, where there is no place for wimps and sissies. This is a marker that is good enough for the team that comes out of the former Soviet Union, the one and only Russian Legion. But they are not the only team that is currently using them in major tournaments around the world, but they are the biggest name.

For many players Macdev is still a foreign name and they have no idea who they are. So here is a quick history lesson, Macdev is an Australian company whose roots date back to 1969 when they were founded in Sydney as an engineering firm, in the mid 90’s they developed and produced the first all aluminum compressed air tank. Then in 2003 they developed the Cyborg which was released as the 04 Cyborg. This paved the way forward for Macdev as a manufacturer of high-end markers and then in 2007 they released the Droid, which was their first spool valved marker and the platform from which the Clone developed of in 2009.

But once again they have worked their Ozzie magic and they have given us the 2011 Clone VX. This is an improved version of their original platform, with changes and improvements to the regulator, the feed neck, the drive, the electronics and of course some new colours.


Some basic info:
Length (without barrel): 21,6cm
Height: 20,5 cm
Weight: 880g (including barrel and battery)
Barrel: Shift barrel System (Cocker thread)
Operating pressure: 100psi
Air source: strictly Air or Nitrogen only
Lube: Macdev Militia lube
Battery: Standard 9v battery
Manual: English (Full colour)
Vision Eye: Break Beam Laser red
Firing modes: 10 (Australian version, Semi only)

Like with most high-ends, you expect it to come with a nice case and Macdev haven’t held back in any way or form in this regard. They have given the Clone a hard fabric zip up clam shell case, that is flexible enough so that it doesn’t bend or break, but still robust enough so that it will protect your Clone from the likes of rough baggage handlers when you travel, to the ride to the field in your kit bag. Once you zip it open, it reveals the two piece Shift barrel, a tool tube with all the hex keys that you will need for general maintenance, a packet of spares and a colour manual. Then there is a soft fabric divider that protects the marker from being scratched by a rouge tool and once flipped it reveals the Clone and a small tube of Militia lube. All of this is held firmly in place by rigid foam that is molded to fit the marker, barrel and tools.


Now, aesthetically the Clone might not be every ones cup of tea, but then again neither is the AK-47 and that is exactly what I would describe the Clone as. A stamped out rugged mans gun, something that looks like it can take a beating, but still work 100% when you need it too. But aesthetics do not hold any performance values at all and sure it’s nice to have a marker that could only be described as looking like a gorgeous super model and not the super models nerdy assistant, but it’s not the end of the world and the Clone is actually not bad looking at all.

The feed neck is one of the things that Macdev has improved upon from their original Clone, as they seemed to have had issues with them in the past.
But so far so good with the new VX feed neck, and quite frankly there isn’t much that companies can do any more with the design of their feed necks. But Macdev has made their feed neck super easy to use and you don’t need any tools to adjust it like some of the other feed necks being used by other manufactures. As we all know that those feed necks with a hex key screw, wheel or knob don’t work well and at best, drive the user totally insane after a while. So the feed neck does its job and does it without causing any irritation to the user and that’s exactly how it should be as it is just a feed neck.


The ASA can only be described as a spinoff of the Angel ASA and there is nothing wrong with that as they have an awesome design. It’s a simple screw in design with the macro line coming out the front and it seems that a lot of manufacturers are following suit. Now this is not only a cleaner look, it is also more comfortable than those with the macro line either on the left or right side of the ASA with a 90degree fitting. So not only does it look good and feel comfortable when you change hands, it also works great with a smooth action when pressurizing and de-gassing your Clone VX. Plus it has a big ASA cap, unlike some other ASA’s where they made them as small as possible, making life harder for those with slightly bigger fingers. But the Clone VX’s one is big finger friendly, so no issues there if you are someone who worries about that.


The Clone comes with an OLED (organic light emitting diode and apparently pronounced “oh-led”) board with a USB port so that you can do your own updates. Now the display and menu interface looks and feels very much like a Tadao Yakuza board and it is said that the guys from Tadao help with the boards and code, and that is great as they have an awesome interface. But Macdev have their own code and they added their latest version to the Clone VX and the Militia 2.0 has everything that even a seasoned player will need. But for those who love to tinker and want that little bit extra adjustability, there is always the option of having your board flashed by the guys from Tadao for $35, this allows you to use the Tengu USB interface and add your own custom boots screens.
But the Clone comes stock with “laser” eyes, which are just the normal break beam eyes but with a coloured led and the standard receiver, so that you can check if your eye’s are working when you check down your breach.


The barrel is the same 14” Shift barrel that came with the original Clone and there was no reason to change it with the VX. Now for those of you, who are only now finding out about Macdev while reading this review, would never have heard of their previous barrel kit the Matchstik. The Matchstik barrel was an awesome barrel that came with different tips and different sized backs and was at the top with the likes of the CP barrels and the Dye barrels. However the Shift is a bit different as it is a two piece barrel that takes specially designed inserts, much like the Freak kit or Deadly Winds barrels. My only complaint is that it doesn’t come with the kit and only comes with a single .691 insert and for today’s paint it’s a bit big.
But Macdev have an insert kit that you can buy with four inserts; .681, .685, .689 and .693 and a plastic tool that is actually completely useless, but expect to pay $99 for these four inserts.


The trigger is a three point adjustable spring return roller bearing trigger, with a shape similar to what we see on the DM and the NT. The trigger like on all high-end markers has very little side to side play and a very smooth pull. There have been people who have said that the Clone trigger isn’t great for semi play, but luckily there are companies that make aftermarket triggers to accommodate those with this view. But there is another thing that might bother a few people and that is the fact that the spring for the tension is a bit soft and this means if you like a nice stiff trigger pull, you won’t find it with the stock spring. But that is easily fixed by finding and installing a harder spring.


The Drivetrain or bolt assembly joins an elite few spoolies with the fact that the bolt can be removed without the use of any tools, but that is where the easy maintenance stops. The bolt assembly probably has the most amount of o-rings on any high-end spoolie out there on the market. So make sure you pick up a set of spare o-rings as there are loads of them that will need replacing and Macdev haven’t exactly added a huge amount to the spares kit. But on the plus side, you can run the marker for quite a while before you need to remove the drive and service it. Now on the v1 and v2 drives in the old Clone, people complained that there was a bit of o-ring shredding going on, but thankfully the guys at Macdev have managed to sort this issue out and the VX drive is backwards compatible with old Clone.
They also use rubber detents similar to those found on the Eclipse markers, which is a smart move as a lot of the paint that we see on the market today is getting smaller. The rubber detents stick out further in the breach then those delrin detents. Macdev also added their all popular gold bolt stock to the new VX is was a huge hit for the original Clone. Then they have also redesigned the end cap making it easier to grip when trying to remove the drive from the marker.


And finally we get to the VX Gladiator regulator, which is an upgraded version of the popular Gladiator regulator that we have seen on Macdev markers from yesteryear. The new version is designed to be much simpler in order to make maintenance a lot easier for the everyday player. Also they have reworked the internal workings of the regulator in order for it to have a higher flow rate and this means it can deliver a more consistent shot than ever before. 


First off the marker is not as uncomfortable as people have made it out to be, the spacing between the trigger guard and the regulator is much bigger than some other markers, which is great as it makes holding it a lot nicer and they gave it a nice big trigger guard, once again catering for those who have big fingers.

The actual grip frame won’t win any prizes for comfort, but it’s not too thin and not to thick, so it’s actually quite nice to hold and won’t bother you if you have smaller or bigger hands like other grip frames.


So first impressions are quite good for the 2011 Clone, but the proof is always in the pudding and with that, we took it to the field to put it through its paces.

First off we threw it over a chrono to check the velocity and consistency using Gelcaps Ignite tournament paint and a .689 insert in the barrel.

First shoot was 284fps, so we decided to leave it for the consistency test and these are the figures we got:

1.289fps
2.286fps
3.281fps
4.281fps
5.281fps
6.278fps
7.282fps
8.284fps
9.281fps
10.279fps

These aren’t bad figures for a marker that has not even been broken in yet, as once it is broken in, it will become even more consistent. 

Now Macdev claim that you should get about 1700 shots off a full 68/4500psi tank and the figures we recorded were a bit lower, but that is to be expected as it’s still a new gun. Once it has seen a lot more paint it will start reaching that magic number of 1700 shots. But even what it got was a lot better than most spoolies straight out of the box.

From a playing point of view the VX is amazing, super smooth out of the box, quiet for those who seem to have an issue with loud markers and very responsive making it great for gun fighting. It shoots with a very flat trajectory like you would expect from any high-end spoolie.

So to end it off, this marker deserves its $1200 price tag as it’s a platform that delivers great performance, solid finish and a full package with everything that you look for in a high-end marker.